Honda Element Owners Club banner

Sirius Radio Install How-To With PICS!

13K views 14 replies 8 participants last post by  Butsky  
#1 · (Edited)
Well I finally installed the Sirius in the car today. I used this set of instructions as my guide ---> CDSpoolRocketResource Guide So all original credit for the idea should be given there. I decided to make a more detailed step-by-step guide. Any additions or changes are welcome!

:evil:pLEASE READ ALL THE WAY THROUGH BEFORE ATTEMPTING!:evil:

All Pictures Are Thumbnails! Click On Them For A Larger Image!

Thanks For Reading!​

Tools needed for install:
- Stubby Phillips Head
- Medium-sized Flat Head
- Scissors
- Electrical tape
- Trim Removal Tool (Optional), You can use the flat head otherwise.


First you need to remove the plastic side panel from the passenger side. There are 6 spots that it is clipped too, marked by blue boxes. Then you need to remove the screw circled in red. :


NOTE
Be careful when removing the side panel for the first time. It snaps out quickly and I got two small scratched next to my air vent:


Next you need to remove two screws from the front panel above the three tray slots:


#2 · (Edited)
Then remove the front panel by pulling at the clip on the bottom right. The front panel is held into place by 8 clips, shown below in the blue boxes. The four screws circled in red will need to be removed later:


Pictures of the removed panel:


Now we need to place the antenna on the roof. I have found that placing it on the first panel as indicated here works best:


The first panel worked best because the cord needs to be run in the black lip above the windshield. With the antenna further out the cord was bunching up:


Ideally your antenna should be placed like this:


After threading through the black lip, you need to go under the panel molding. The panel parallel to the windshield is clipped into the roof panel. It easily unsnaps. Pull it back slightly and run the wire underneath. Make sure your wire is not on the clips teeth. Then snap back into place:


Next, pull back the rubber door lining:

 
#3 · (Edited)
You need to run the wire down the edge. There is an indent on the edge that the wire lines up with perfectly. Secure with electrical tape. I cut small pieces, and then cut those in half:


Then the left over wire, at the bottom, needs to be run behind this plastic knob:


Then push the rubber lining back all the way onto the edge. The wire from the roof will be visible:


Now you need to remove the 4 screws mentioned before, circled in red below:


After removing the 4 screws, the plastic panel needs to be removed. Start at the bottom right and pull down and forward:


This is how it looks with the panel removed. The wire needs to go in at the arrow and exit at the blue box:

 
#4 · (Edited)
The space to run the wire in is long, and I found it easiest to attach the wire to your flat-head with electrical tap and stick your hand in as far as you can above the exit point:


After the wire is through, make sure the excess is bundled up tightly:


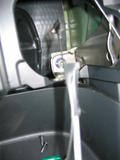
Put the excess in the lower section next to the factory wiring indicated by the blue line. There is plenty of room here. The picture below shows the bundle halfway in. Push it under the air vent opening:


Next you want to secure any loose wire. I found only two spots needing electrical tape:


Then replace both front plastic panels and the side panel:


#5 · (Edited)
Now you need to mount your radio! I only had the suction cup mount and lost my other options. I decided to try using Velcro. I attached a Velcro square (rough side) to the first tray, and attached the soft side to the suction cup. I then cut around the edge of the suction cup to remove the excess:


It's a solution for now. It is pretty sturdy, but not 100%. It holds, but can bobble over railroad tracks or bumps.

Some final pics with my GPS and cell phone hooked up. Still looks a mess but it's the neatest I could do it while keeping some functionality:


Now your finished! You can enjoy Sirius Satellite Radio in your Honda Element! :grin::grin::grin: This whole install took 45 min to an hour with taking pics and hunting down tools/supplies as I went along. Also for those interested, this is the 12v 3-outlet that I used.
 
#10 ·
Great job documenting!

I did the same procedure as well. One thing to add (that I learned the hard way)....be gentle when removing that panel, as you have to rotate it clockwise to get the vent duct out. If you just pull straight out, the vent panel's tabs snap off and the vent will not stay locked on. Ends up rattling something fierce.
:)
 
#11 ·
Way to go !

Way to go Samich,

I have a question and a comment,

Question: I thought there was an airbag under the front panel???? Anyone ??

Comment: Don't know where you live, but that does look like a whole lotta electronics there, just what thieving scoundrels like to see? Aren't you worried about theft?
 
#12 ·
Way to go Samich,

I have a question and a comment,

Question: I thought there was an airbag under the front panel???? Anyone ??

Comment: Don't know where you live, but that does look like a whole lotta electronics there, just what thieving scoundrels like to see? Aren't you worried about theft?
The airbag was my first thought too! It actually sits higher up and behind the vent in the dash area. I live in suburbia OH. I have security in my parking garage at work in Cleveland. I can take the GPS down and suction is back up. I just throw it in the glove box. I can also remove the Sirius from the mount if need be.
 
#13 ·
I just got a Mirge and used this "how-to" to install it. The info in here was great. The only warning I have is for anyone who uses the adhesive pad to on the faceplate around the radio. The Alcohol pad and silicone remover pad take the paint off the plastic. I've read other article complaining about the poor quality of the paint on the panelling around the radio, but didn't think about it until it was to late.
 
#15 ·
Installation Pics

This guide was great, and helped me today when I did my install on my `05 Element. I went one step further and brought antenna wire all the way to the area below the left side vent near turn signal stalk. XM radio unit closer, easier to operate and less eyes-off-the-road factor!