Hello!
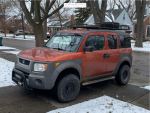
I bought this 2008 Element new from the dealer in 2008. It served well as our family car for many years. Eventually we “upgraded” to a 2016 Honda Accord and then a 2018 Tesla Model 3. The Element was used occasionally but was somewhat neglected.
This past summer I went camping with some friends and family and they had 4x4 vans and I could barely keep up down some real tough roads with my stock Element and home-made sleeping platform.
I wanted more. I looked at some Sprinter van builds but couldn’t stomach paying $60k-$140k. Plus I liked my Element and it only has 76k miles! I dusted off my EOC account and started researching.
Inspired by you all, I’ve decided to build my Element into the microcamping rig it was meant to be.
Done
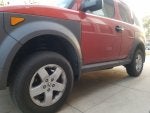
- HRG “Ultimate” 3” lift kit with 1” subframe drop
- Falken Wildpeak 235/70R16 with full-size spare
- Skid Plate Guy engine skid plate
- Skid Plate Guy fuel tank skid plate
- Fifth Element Camping microcamper system
- Gobi Ranger rack
- ARB awning
- Plastidip wheels black
- Wrap/plastidip/raptor liner body Toyota Quicksand color